Howto::CSThunderbird: Difference between revisions
Jump to navigation
Jump to search
No edit summary |
No edit summary |
||
| Line 4: | Line 4: | ||
* Select "Email account on the "New Account Setup" screen | * Select "Email account on the "New Account Setup" screen | ||
* Click on "Next >" | * Click on "Next >" | ||
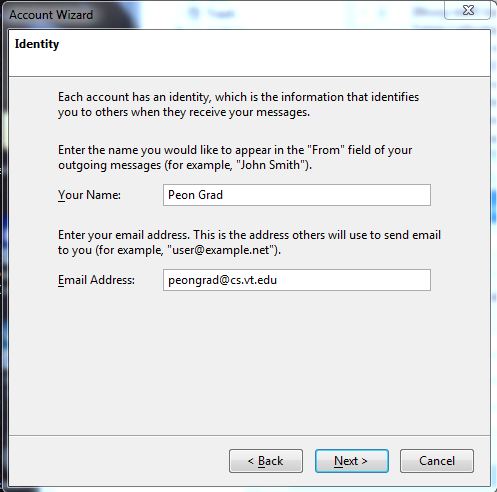
* Enter your full name and email address: ''username@cs.vt.edu'' [[Image:Thunderbird3_1]] | * Enter your full name and email address: ''username@cs.vt.edu'' | ||
[[Image:Thunderbird3_1]] | |||
* Click on "Next >" | * Click on "Next >" | ||
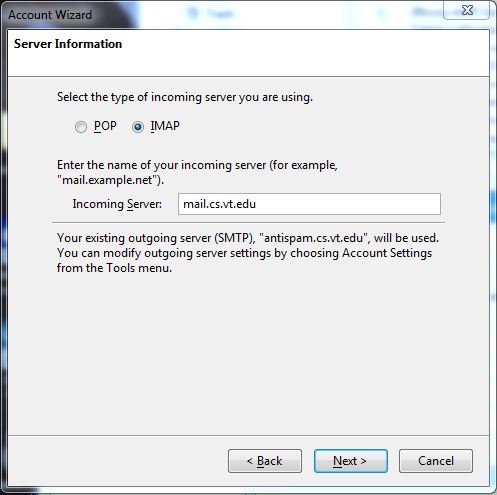
* Select "IMAP" and set "Incoming Server" to ''mail.cs.vt.edu'' [[Image:Thunderbird3_2]] | * Select "IMAP" and set "Incoming Server" to ''mail.cs.vt.edu'' | ||
[[Image:Thunderbird3_2]] | |||
* Click on "Next >" | * Click on "Next >" | ||
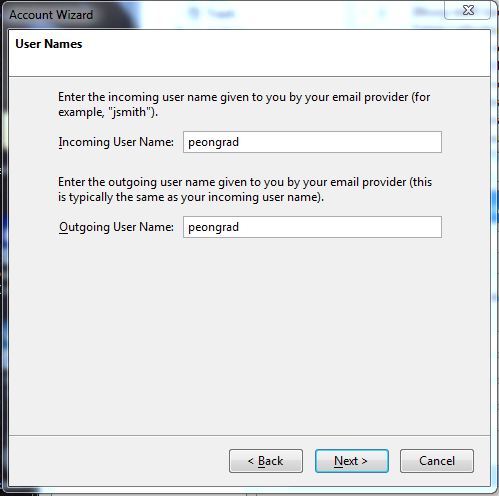
* If not already filled in, enter your CS username in both "Incoming" and "Outgoing User Name" [[Image:Thunderbird3_3]] | * If not already filled in, enter your CS username in both "Incoming" and "Outgoing User Name" [[Image:Thunderbird3_3]] | ||
* Click on "Next >" | * Click on "Next >" | ||
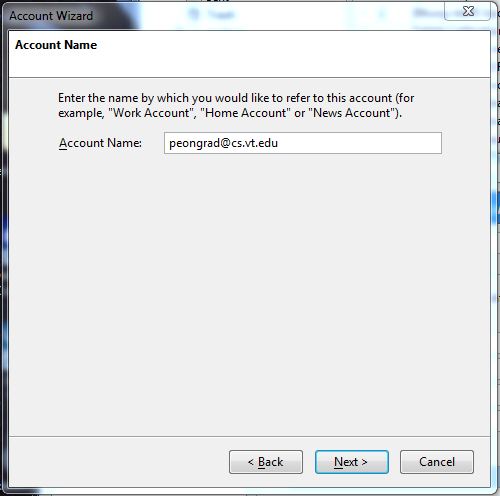
* Enter an identifier for this account, you can set it to anything you want [[Image:Thunderbird3_4]] | * Enter an identifier for this account, you can set it to anything you want | ||
[[Image:Thunderbird3_4]] | |||
* Click on "Next >" | * Click on "Next >" | ||
* Verify all the settings and click on "Finish" | * Verify all the settings and click on "Finish" | ||
* Go to Tools->Account Settings | * Go to Tools->Account Settings | ||
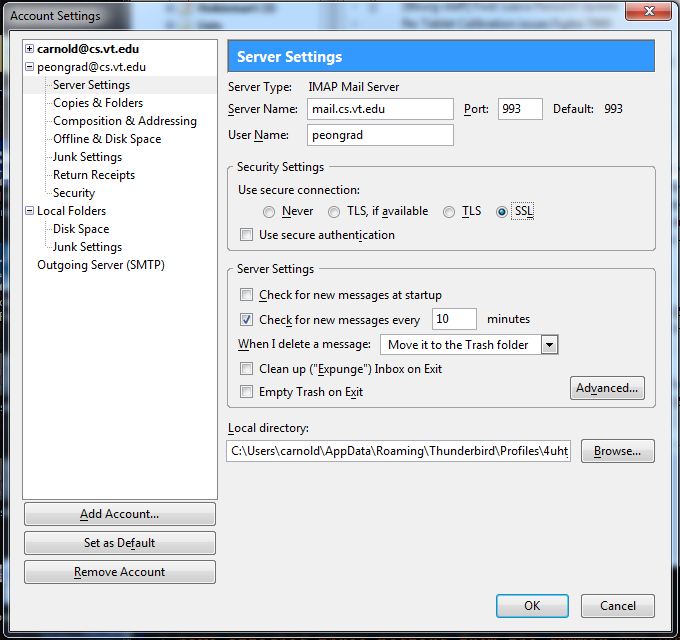
* Click on "Server Settings" listed under the account you just created | * Click on "Server Settings" listed under the account you just created | ||
* Select "''SSL''" and make sure Port is set to ''993'' [[Image:Thunderbird3_5]] | * Select "''SSL''" and make sure Port is set to ''993'' | ||
[[Image:Thunderbird3_5]] | |||
* Click on "Outgoing Server (SMTP)" at the bottom of the "Account Settings" window | * Click on "Outgoing Server (SMTP)" at the bottom of the "Account Settings" window | ||
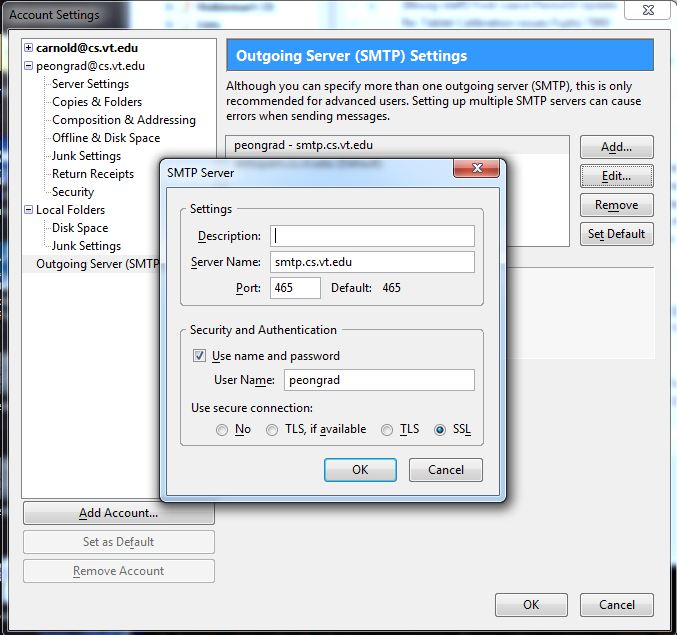
* Click on the "Add..." button | * Click on the "Add..." button | ||
* Enter ''smtp.cs.vt.edu'' as "Server Name", your CS username as "User Name", select "''SSL''", and make sure that "Port" is set to ''465'' [[Image:Thunderbird3_6]] | * Enter ''smtp.cs.vt.edu'' as "Server Name", your CS username as "User Name", select "''SSL''", and make sure that "Port" is set to ''465'' | ||
[[Image:Thunderbird3_6]] | |||
* Click on "OK" to close the SMTP Server window | * Click on "OK" to close the SMTP Server window | ||
* Select the newly added Outgoing Server and click on the "Set Default" button | * Select the newly added Outgoing Server and click on the "Set Default" button | ||
Revision as of 16:07, 12 July 2011
Configuring Thunderbird to use CS email
Thunderbird 2.x
- Select "Email account on the "New Account Setup" screen
- Click on "Next >"
- Enter your full name and email address: username@cs.vt.edu
- Click on "Next >"
- Select "IMAP" and set "Incoming Server" to mail.cs.vt.edu
- Click on "Next >"
- If not already filled in, enter your CS username in both "Incoming" and "Outgoing User Name"
- Click on "Next >"
- Enter an identifier for this account, you can set it to anything you want
- Click on "Next >"
- Verify all the settings and click on "Finish"
- Go to Tools->Account Settings
- Click on "Server Settings" listed under the account you just created
- Select "SSL" and make sure Port is set to 993
- Click on "Outgoing Server (SMTP)" at the bottom of the "Account Settings" window
- Click on the "Add..." button
- Enter smtp.cs.vt.edu as "Server Name", your CS username as "User Name", select "SSL", and make sure that "Port" is set to 465
- Click on "OK" to close the SMTP Server window
- Select the newly added Outgoing Server and click on the "Set Default" button
- Click on "OK" to close the "Account Settings" window
- Your CS email should ready to use