Share
How to use share.cs.vt.edu
About
share.cs.vt.edu is a departmental resource to help facilitate collaboration by allowing you to share files with an arbitrary group of users on a variety of computer platforms. Example: a file share among office staff who need access to the same, up to date, documents. share.cs.vt.edu uses WebDAV technology which is based on the already popular HTTP protocol. There are a variety of ways to connect and use a WebDAV resource. Some of them are listed below.
Creating a share
For now, you must contact techstaff@cs.vt.edu to create a share. In the future, we may create a tool that will allow you to create your own share online. Options to consider when you make your request to the techstaff: share name, who should have access, and whether to use CS login or some other login.
Accessing a share
All OSes
If you just need to read or copy a file from a share, then the quickest and easiest way from any Internet connection is to open a web browser and go the URL: https://share.cs.vt.edu/sharename replacing sharename with the name of the share you want to connect to.
There is also an extension to Firefox to allow connections to WebDAV called Webfolders. You can get the lastest version here: http://webfolder.mozdev.org
Microsoft Windows
- The recommended method to connect to a WebDAV share is to use the University available software called WebDrive. See instructions on downloading and installing WebDrive here: http://answers.vt.edu/kb/entry/2284
- After installing the program, run it
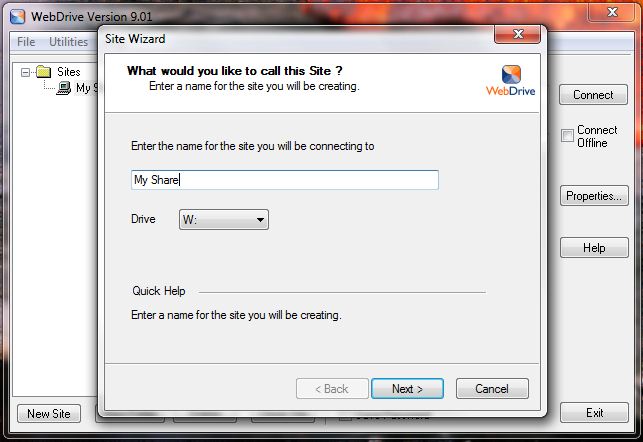
- Click on "New Site" to bring up the Site Wizard
- Enter a name you want to call this share -- it can be called anything you want
- Select the drive letter you wish map this share to
- Click on "Next"
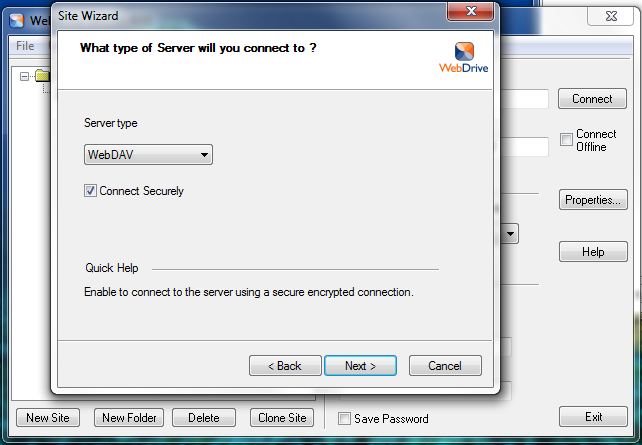
- Select "Server type" of "WebDAV"
- Check the box for "Connect Securely
- Click on "Next"
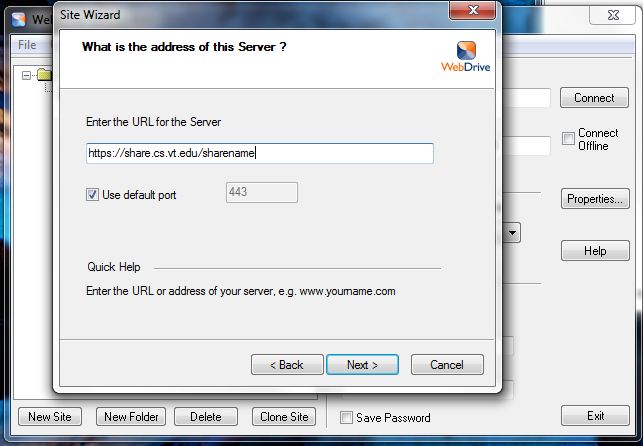
- Enter the URL for your share which will be https://share.cs.vt.edu/sharename replacing sharename with the name of the share you want to connect to
- Check the box for "Use default port"
- Click on "Next"
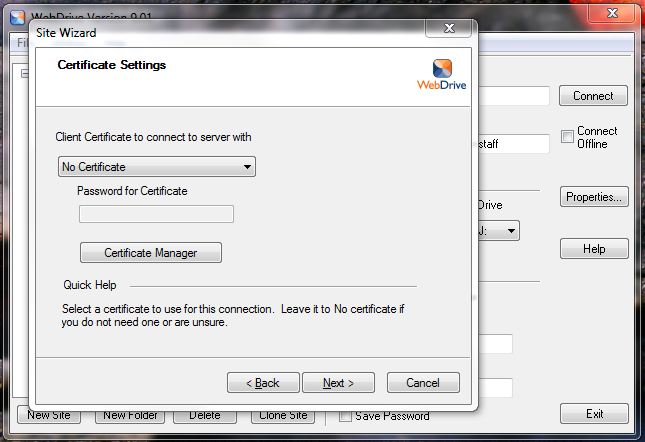
- Select "No Certificate" from the drop-down box
- Click on "Next"
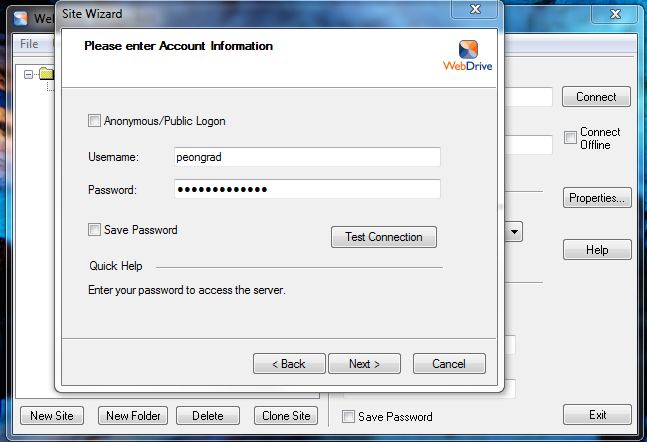
- Enter your username/password -- this will generally be your CS SLO login but varies based on the share you are connecting to
- Click on "Next"
- Click on "Finish"
Microsoft Windows 7
- Enable the WebClient service
- From the Start menu, choose Control Panel, then System and Security, then Administrative Tools, and then Services.
- Scroll down to WebClient, set the service to Automatic, and then click Apply.
- If the service is not already running, click Start.
- Click OK to close the Control Panel.
- Open "My Computer"
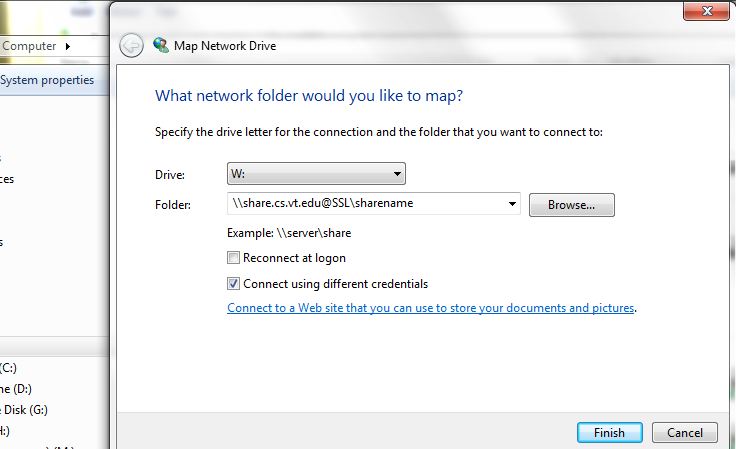
- Click on "Map Network Drive"
- Select the Drive letter you want to map
- Enter into "Folder:" \\share.cs.vt.edu@SSL\sharename replacing sharename with the name of the share you are connecting to
- Click on "Finish"
Mac OS/X
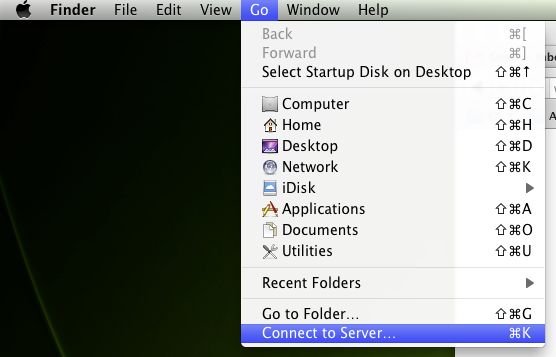
- Switch to the Finder
- Select the "Go" menu and then select "Connect to Server..."
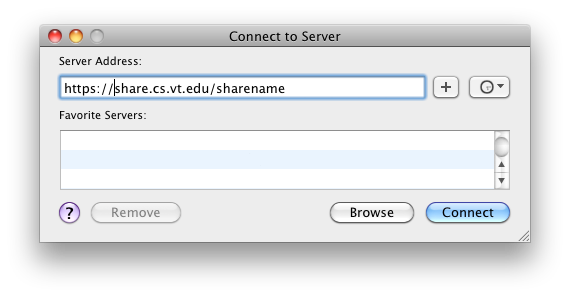
- Enter the URL for your share which will be https://share.cs.vt.edu/sharename replacing sharename with the name of the share you want to connect to
- Enter your username and password
Linux
There are a few ways to connect to WebDAV shares through linux:
Cadaver (command line interface)
Cadaver is a command-line utility similar to FTP that will allow you to connect, read, and write to WebDAV shares. Just connect to the URL: https://share.cs.vt.edu/sharename replacing sharename with the name of share you want to connect to
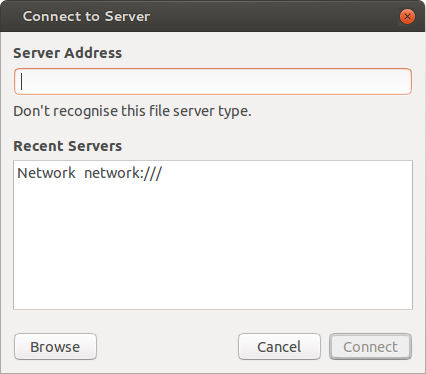
Gnome Desktop
The ability to connect to WebDAV shares in gnome is a built-in feature.
- In the "File" menu at the top of the desktop, choose "Connect To Server"
- In the "Server Address" field type: davs://share.cs.vt.edu/sharename
- Click "Connect" and enter your username and password when promted
Modifying a share
Contact techstaff@cs.vt.edu with the change you would like to make.
